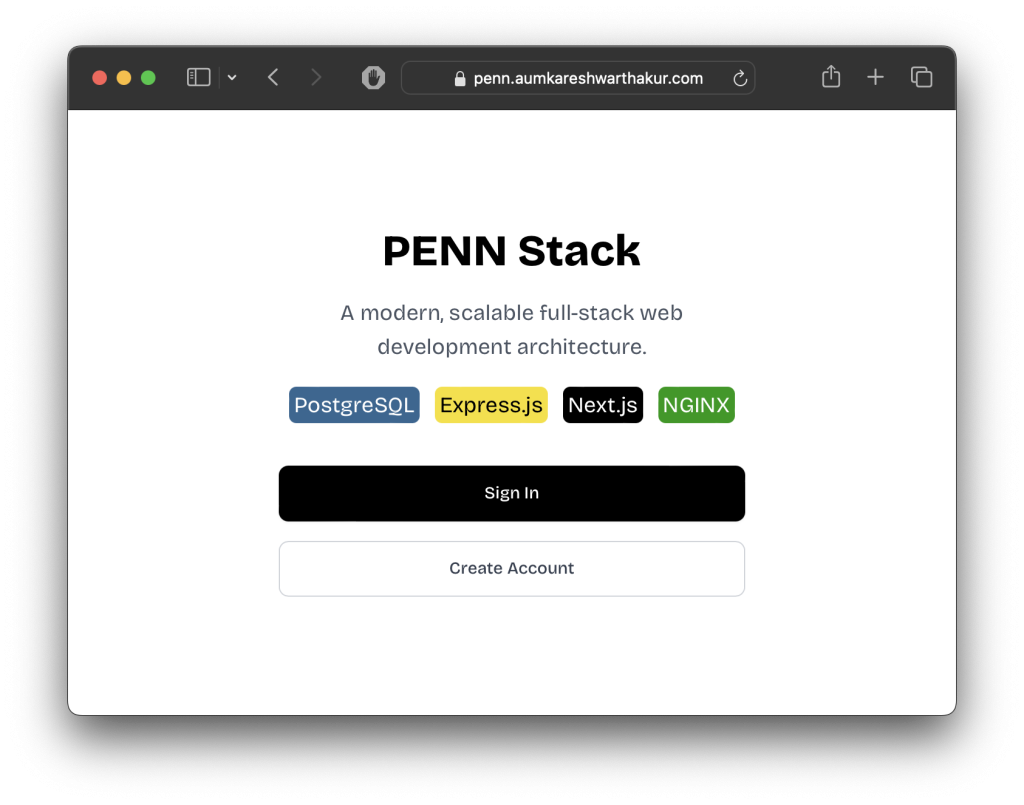
PENN STACK
A modern, scalable full-stack web development architecture.
Introduction
In a world dominated by serverless architectures and escalating cloud expenses, the value of owning and scaling your own infrastructure often gets overlooked. Driven by a commitment to simplicity, control, and affordability, PENN Stack was born.
PENN Stack combines four powerful technologies—PostgreSQL, Express.js, Next.js, and Nginx—into one cohesive and scalable solution. Designed for developers who appreciate self-hosted infrastructure without sacrificing modern capabilities, PENN Stack empowers you to effortlessly deploy your applications on a DigitalOcean Droplet using a convenient 1-Click app available in the marketplace.
Take control of your tech stack, minimize your cloud costs, and scale to millions without compromise.
Getting Started After Deployment
After creating your Droplet, visit its public IPv4 address to view your PENN Stack application. If you see a Database Connection Error , don’t worry! It’s expected. You’ll need to SSH into your Droplet to configure it.
Step 1: Login to your droplet
Connect to your Droplet as root via SSH from your local terminal. Replace your_droplet_ip with your actual Droplet IP address:
ssh root@your_droplet_public_ipv4Step 2: Server Setup Wizard
Upon SSH connection, an interactive Server Setup Wizard will launch automatically. Select option 3 (Domain & PostgreSQL setup) for typical installations.
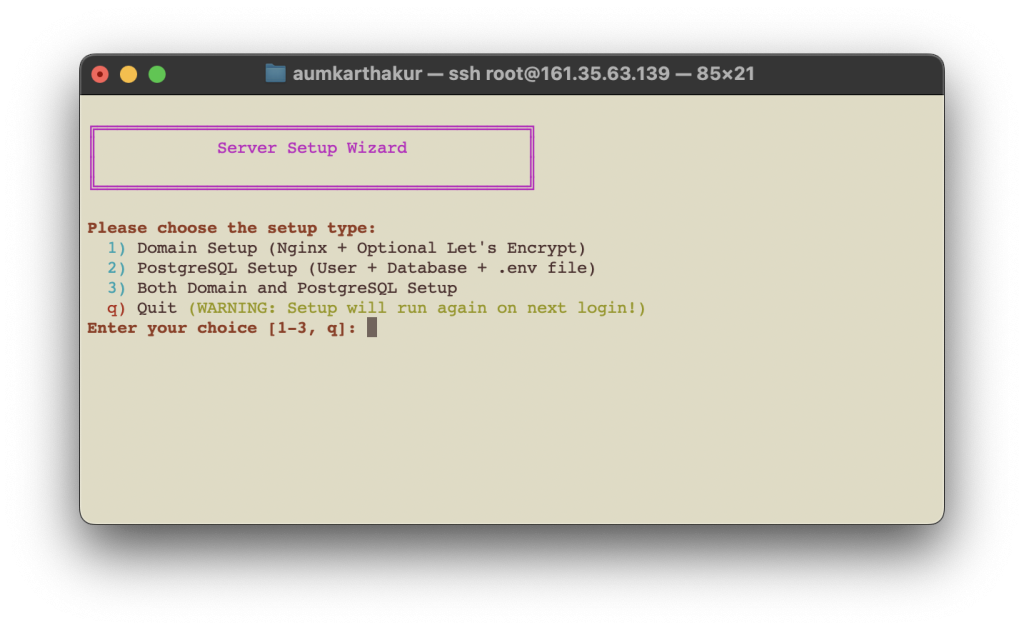
If the wizard doesn’t launch automatically, run it manually with:
/opt/setup_scripts/setup.shNginx Domain Setup
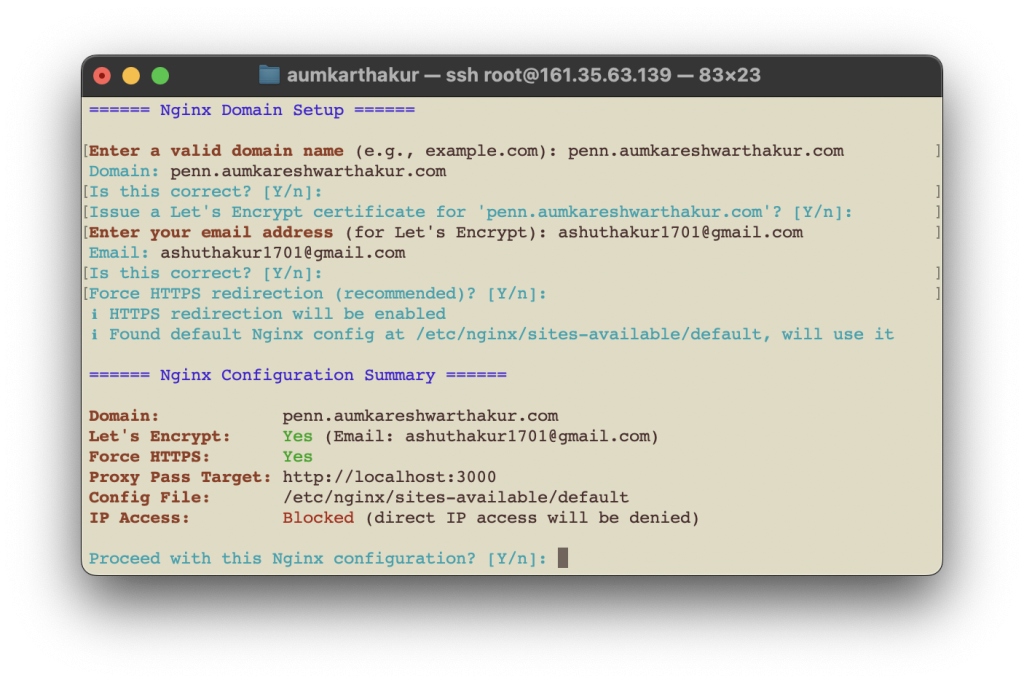
Enter your domain and email to configure SSL with Let’s Encrypt. Choose Y for HTTPS redirection. After completion, review the configuration summary.
Your Application is Accessible via Domain
After setting up Nginx, your application is accessible via the domain provided during configuration.
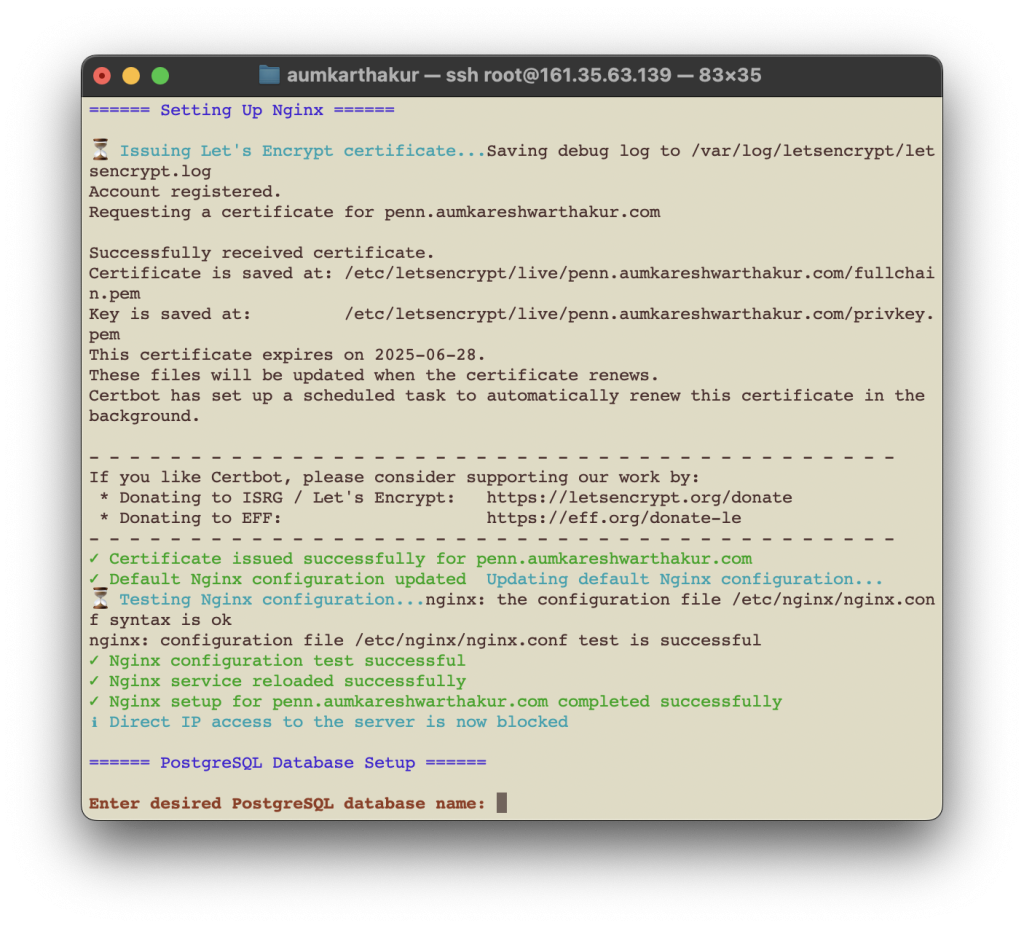
PostgreSQL Database Setup
Next, configure your PostgreSQL database by entering your preferred database name and username.
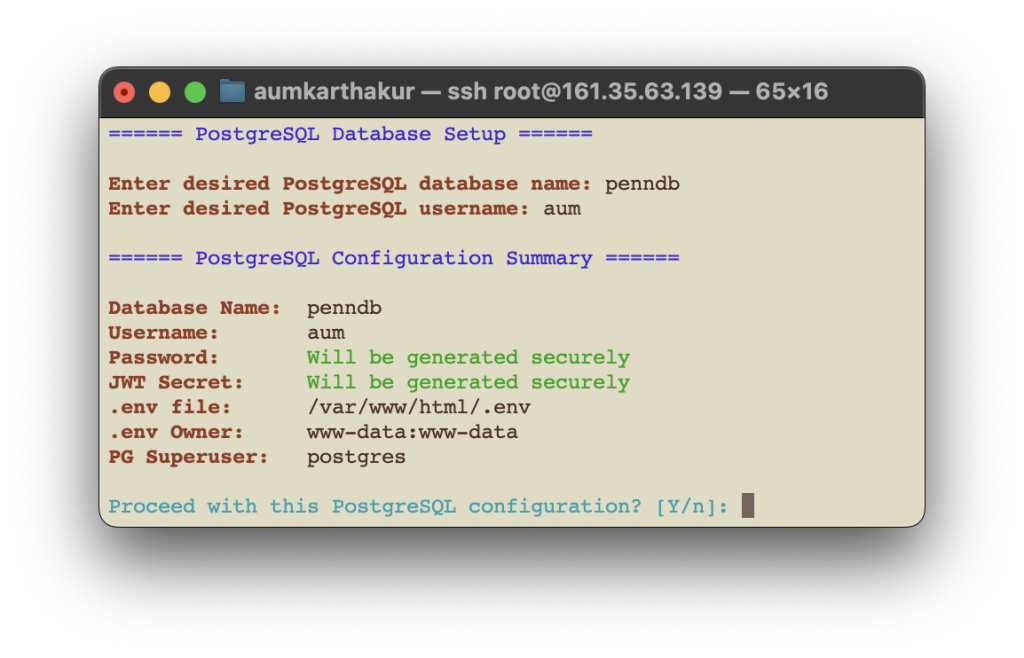
The wizard will create the PostgreSQL database and user, storing credentials in /var/www/html/.env.
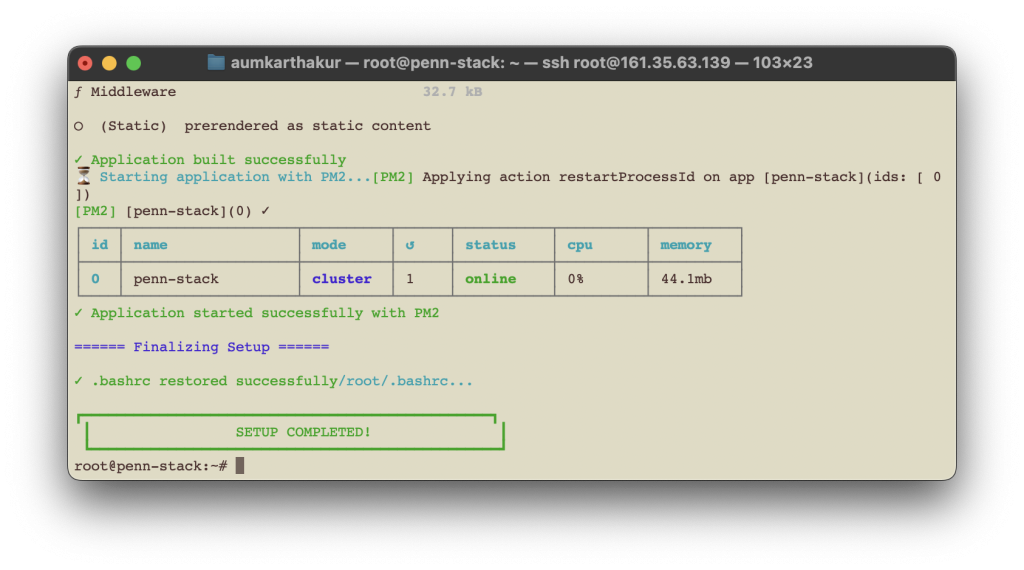
Next.js will rebuild automatically. After completion, PM2 restarts the app, confirming with a “SETUP COMPLETED” message.
Accessing application code
Your application files are located at /var/www/html. You can use FileZilla or another SFTP client to upload or modify files.
Useful Commands
Following are useful commands which you’ll be using every now and then:
Rebuilding App
npm run buildRestarting PM2 (Required after rebuilding app)
pm2 start ecosystem.config.cjsChecking Logs
pm2 logsBonus Github CI/CD Pipeline
I recommend setting up a CI/CD pipeline for your PENN stack application using GitHub Actions. Here’s a clear workflow you can follow:
- Push your PENN stack app code to a GitHub repository.
- Clone the repository to your local machine for development and edits.
- Push your changes from your local machine back to GitHub.
- Use GitHub Actions to automatically deploy updates to your DigitalOcean droplet whenever changes are pushed.
- Below is a sample GitHub Actions workflow configuration (deploy.yml) to automate this process:
name: Deploy PENN Stack App

on:
  push:
    branches:
      - main

jobs:
  deploy:
    runs-on: ubuntu-latest
    steps:
      - name: Checkout Code
        uses: actions/checkout@v4

      - name: Deploy to Droplet
        uses: appleboy/ssh-action@master
        with:
          host: ${{ secrets.DROPLET_IP }}
          username: ${{ secrets.DROPLET_USER }}
          key: ${{ secrets.SSH_PRIVATE_KEY }}
          script: |
            cd /var/www/html
            git pull origin main
            npm install
            npm run build
            pm2 restart ecosystem.config.cjs